One of the most alluring features of our home is the sunroom at the back of the house. This undergoes the conversion to seed starting room over the next few weeks, although I have already started a flat of them and will likely do another two before I arrange more shelves. Although my seedlings stretch more thinly than commercially grown ones (I do not use grow lights, so the tiny plants stretch towards the sun until the days grow longer), they usually fare well once in the ground. In my opinion, sun is the most important factor to starting seeds without grow lights, and the sunroom offers plenty of it.

I start seeds for the variety. There are dozens and dozens more varieties available via seed catalogue than you can buy in your garden centre. This year for the first time, I received a catalogue from Heritage Harvest Seed - I cannot wait to receive my order, which includes the very rare Reisetomate, Canada Crookneck Squash, and Worcester Indian Beans.
I also start seeds for the wonder. Simply put, it is amazing to watch them grow.
I do not start seeds for the savings. I get too excited and buy too many seeds. In theory, however, you could save quite a bit if you split packages with friends, or used up all your seeds before buying new ones. Or only bought exactly what you needed. I am neither organized or controlled enough to manage this.
That being said, my favorite types and varieties that pass the "easy-peasy to grow and maybe even economical" test include:
- Tomatoes - any type, but our family finds in particular that paste tomatoes, cherry tomatoes, and heirloom tomatoes offer savings and are easy to grow. I pick varieties recommended for home growers from my favorite seed companies, but also ones that look interesting: that is how I have tried Sicilian Saucer, Big Brandy Hybrid, and this year the Reisetomate, and Opalka.
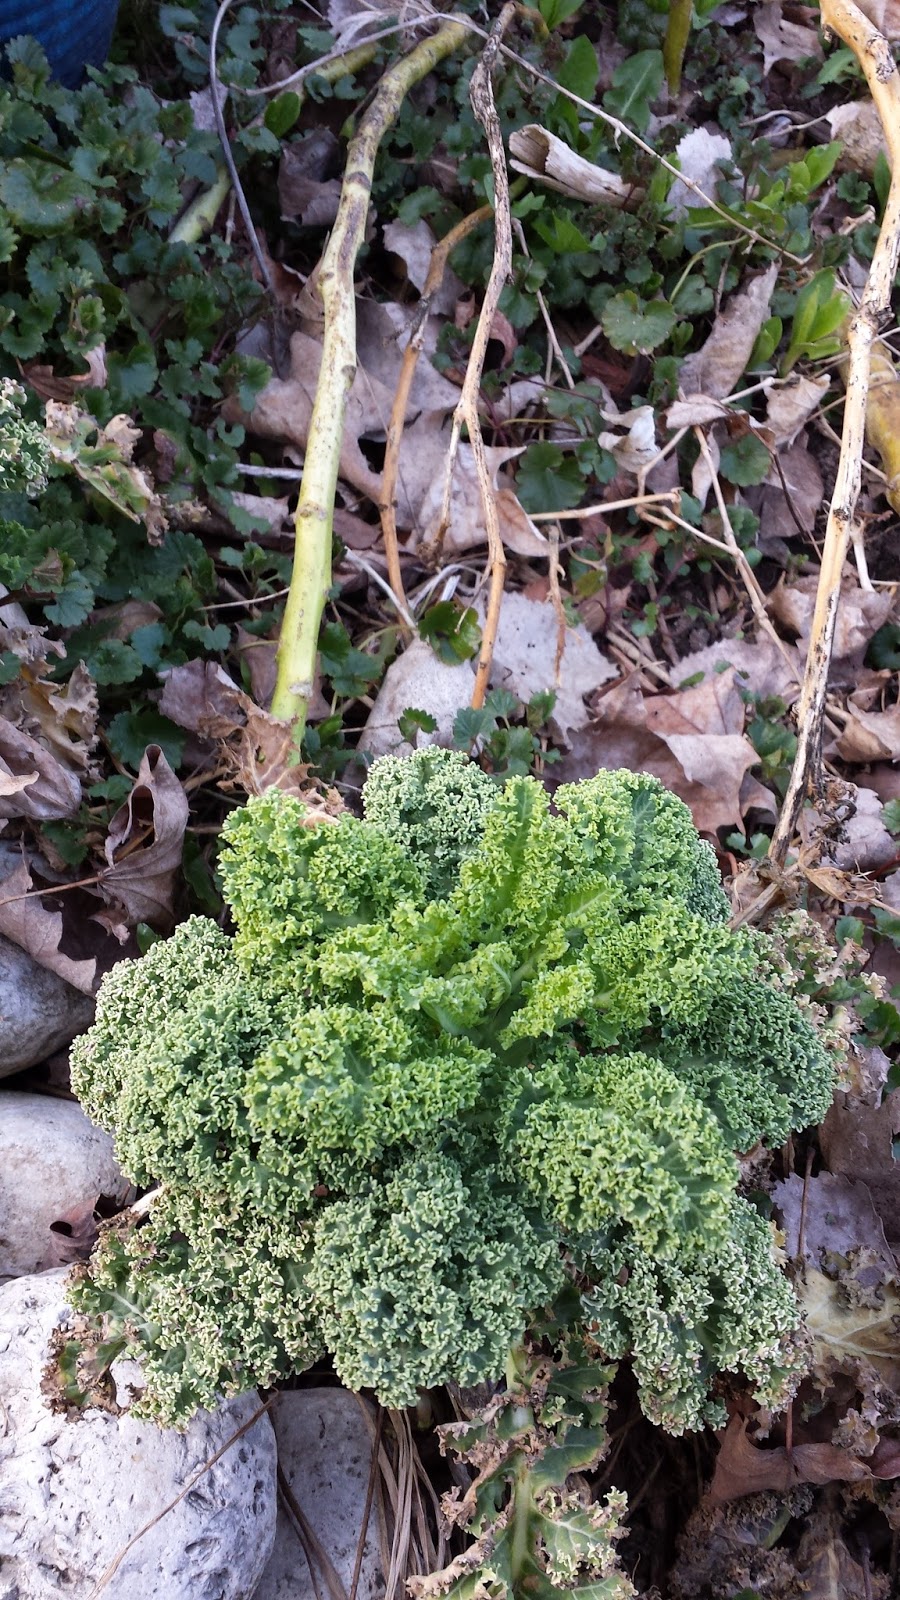
- Kale - Darkibor hybrid - I had success overwintering this kale for 3 seasons before it got in the way of an expanding garden terrace. It did not survive the transplant. However, it was prolific, and worth a try for the gardener who likes kale.
- Squash - I have had success with both butternut squash and pumpkins. I am going to try tucking them into beds near the front of the lot (and the road), which I am converting into perennial space. This year, I am also growing zucchini, something I've held off on because I have a friend who drops off mega-zucchinis every week. It's payback time.
- Beans and radishes - all kinds, any kinds. Both germinate readily when sown directly in the soil, meaning that you don't even need to start seedlings!
I generally seed everything within a one month period, creating a timing disaster come planting time, and consequently everything goes in late, and bears fruit late. This year will be different. I repeat! This year will be different! I am exceptionally pleased with myself for having already started a flat's worth of perennials.
My seed starting routine
1. Select your seeds however you will: my selections are largely based on what I want to eat, what has grown well in the past, what looks interesting and unique to grow, and approximately how much space we have. I write a list of the kinds of seeds I need that year - there are likely a dozen or so types/varieties on that list - then select seeds from catalogues, grossly exceeding the number of things on the list. I make one in-person trip to William Dam Seeds. I have yet to pass a season where I don't buy at least twice as much as I need.2. Plan out when you will start each type, and write the dates down on a calendar. (I have a calendar dedicated to gardening and also record the actual dates that I seed things, as well as projected planting dates, etc). I use instructions on the packet and an approximate last frost date. Sweet Domesticity gives an easy-to-follow schedule in her Seed Starting Bootcamp post, which is much more comprehensive and knowledgeable than this post is.
 3. Prepare your materials: pots, trays, and medium. I am using newspaper pots this year, as after a few years of working with Jiffy Pots I have decided they don't hold enough soil, and therefore require more frequent watering. I generally use cheap seed starting trays and their fitted covers, but managed to misplace all but two of them this year. So I am jamming my seeds into take out containers. You SHOULD make sure your trays are rinsed out. Mine this year were not, as evidenced by the strange seedlings popping up from the bottom of the tray. For medium, I usually buy whatever seed starter is available at Canadian Tire. It is not the cheapest option, but generally comes in nicely contained small-ish bags, which don't make a mess in my sunroom.
4. Plant according to your schedule. I add soil to the pots, moisten them with water (which also helps keep your paper pots together), arrange them in the tray, create my labels, and then plant.
I plant 2 - 3 seeds per pot, again, according to the instructions on the packet for depth. I always cover the tray, preferably with a fitted lid, which keeps the soil moist. Seedlings are labelled and the tray is placed in a window with southern exposure.
And if for no other reason, at the end of winter, starting seeds is a wonderful way to rejuvenate hope for spring.
